VisionExplainer for image classification
The class VisionExplainer is designed for vision tasks, acting as a factory of the supported vision explainers such as integrated-gradient and Grad-CAM. VisionExplainer provides a unified easy-to-use interface for all the supported explainers. In practice, we recommend applying VisionExplainer to generate explanations instead of using a specific explainer in the package omnixai.explainers.vision.
[1]:
# This default renderer is used for sphinx docs only. Please delete this cell in IPython.
import plotly.io as pio
pio.renderers.default = "png"
[2]:
import json
import torch
import numpy as np
from torchvision import models, transforms
from PIL import Image as PilImage

from omnixai.preprocessing.image import Resize
from omnixai.data.image import Image
from omnixai.explainers.vision import VisionExplainer
from omnixai.visualization.dashboard import Dashboard
In this example, we consider an image classification task. We recommend using Image to represent a batch of images. Image can be constructed from a numpy array or a Pillow image. The following code loads three images and resizes them to (256, 256). It then constructs an Image object to store the three images. By default, the shape of an Image object has the format (batch_size, height, width, channel), e.g., (3, 256, 256, 3).
[3]:
# Load images for testing
img_1 = Resize((256, 256)).transform(Image(PilImage.open('data/images/dog_cat.png').convert('RGB')))
img_2 = Resize((256, 256)).transform(Image(PilImage.open('data/images/dog.jpg').convert('RGB')))
img_3 = Resize((256, 256)).transform(Image(PilImage.open('data/images/camera.jpg').convert('RGB')))
img = Image(
    data=np.concatenate([
        img_1.to_numpy(), img_2.to_numpy(), img_3.to_numpy()]),
    batched=True
)
print(img.shape)
(3, 256, 256, 3)
For visulization, the class names corresponding to the labels are also loaded.
[4]:
with open('data/images/imagenet_class_index.json', 'r') as read_file:
    class_idx = json.load(read_file)
    idx2label = [class_idx[str(k)][1] for k in range(len(class_idx))]
The model considered here is a ResNet model pretrained on ImageNet. Similar to TabularExplainer, to initialize VisionExplainer, we need to set the following parameters:
explainers: The names of the explainers to apply, e.g., [“gradcam”, “lime”, “ig”, “ce”].model: The ML model to explain, e.g., a scikit-learn model, a tensorflow model, a pytorch model or a black-box prediction function.preprocess: The preprocessing function converting the raw data (aImageinstance) into the inputs ofmodel.postprocess(optional): The postprocessing function transforming the outputs ofmodelto a user-specific form, e.g., the predicted probability for each class.mode: The task type, e.g., “classification” or “regression”.
The preprocessing function takes an Image instance as its input and outputs the processed features that the ML model consumes. In this example, the Image object is first converted into a torch tensor via the defined transform and sent to particular device.
The postprocessing function is a simple softmax function transforming the output logits into class probabilities.
[5]:
device = "cuda" if torch.cuda.is_available() else "cpu"
# The preprocessing function
transform = transforms.Compose([
    transforms.Resize(256),
    transforms.CenterCrop(224),
    transforms.ToTensor(),
    transforms.Normalize(mean=[0.485, 0.456, 0.406], std=[0.229, 0.224, 0.225])
])
preprocess = lambda ims: torch.stack([transform(im.to_pil()) for im in ims]).to(device)
# A ResNet model to explain
model = models.resnet50(pretrained=True).to(device)
# The postprocessing function
postprocess = lambda logits: torch.nn.functional.softmax(logits, dim=1)
We now create a VisionExplainer, e.g., the selected explainers include Grad-CAM, LIME, integreated-gradient and counterfactual. params in VisionExplainer allows setting parameters for each explainer applied here. For example, “target_layer” (a convolutional layer for analysis) for Grad-CAM is set to the last layer of model.layer4.
There is no “global explanation” for VisionExplainer currently. One can simply call explainer.explain to generate local explanations for vision tasks.
[6]:
# Initialize a VisionExplainer
explainer = VisionExplainer(
    explainers=["gradcam", "lime", "ig", "ce", "scorecam",
                "smoothgrad", "guidedbp", "layercam"],
    mode="classification",
    model=model,
    preprocess=preprocess,
    postprocess=postprocess,
    params={
        "gradcam": {"target_layer": model.layer4[-1]},
        "ce": {"binary_search_steps": 2, "num_iterations": 100},
        "scorecam": {"target_layer": model.layer4[-1]},
        "layercam": {"target_layer": model.layer3[-3]},
    }
)
# Generate explanations
local_explanations = explainer.explain(img)
Binary step: 2 |███████████████████████████████████████-| 99.0%
100%|██████████| 2048/2048 [00:18<00:00, 112.44it/s]
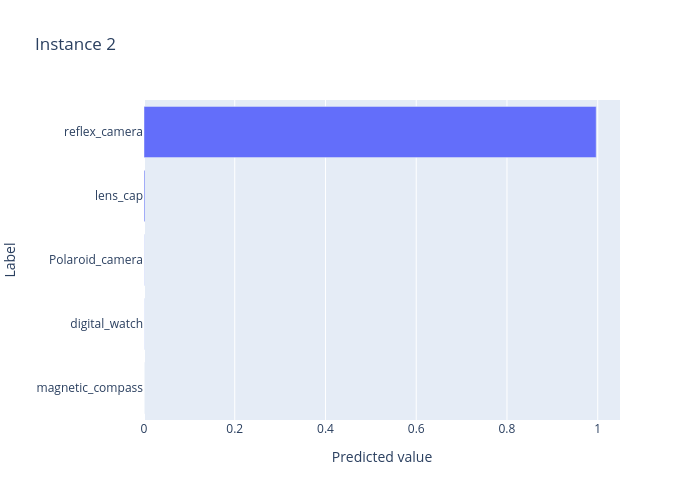
ipython_plot plots the generated explanations in IPython. Parameter index indicates which instance to plot, e.g., index = 0 means plotting the first instance in img.
[7]:
index=2
for name, explanations in local_explanations.items():
    print(f"{name}:")
    explanations.ipython_plot(index, class_names=idx2label)
predict:
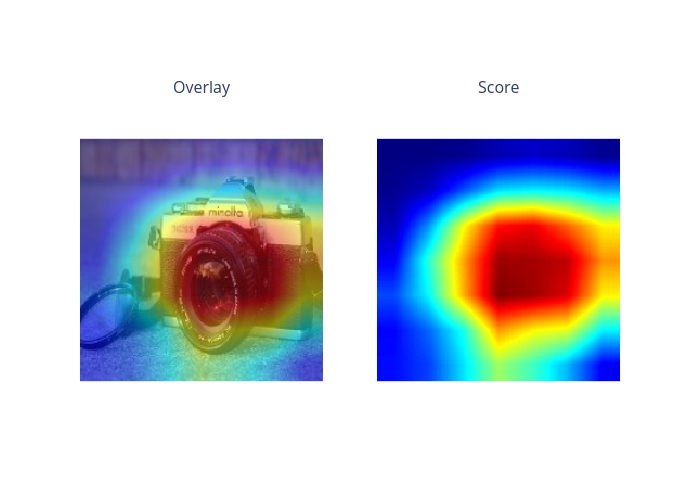
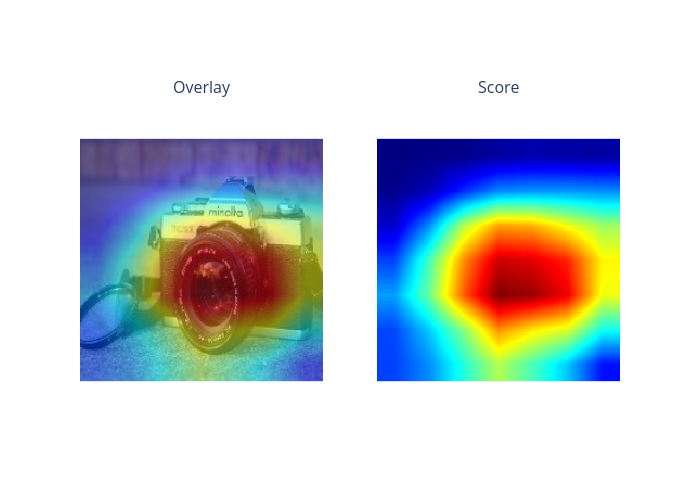
gradcam:
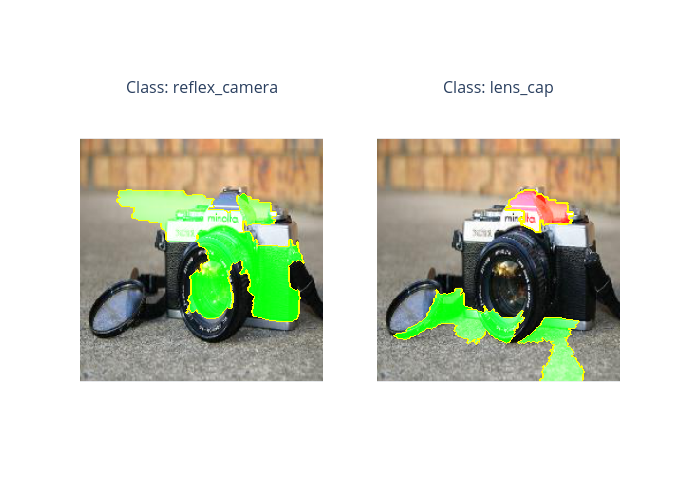
lime:
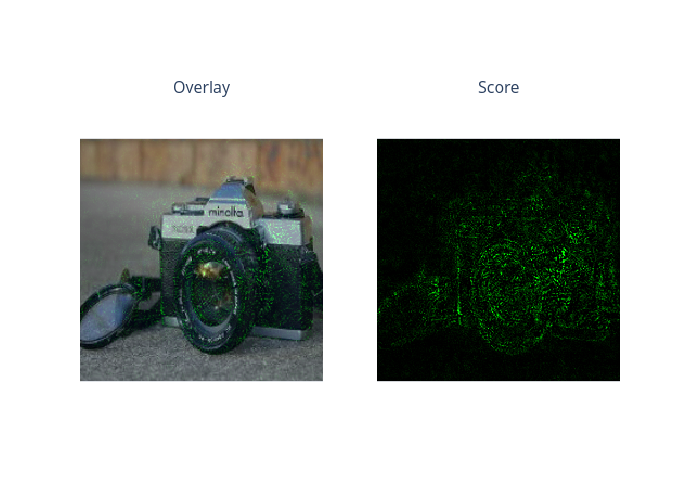
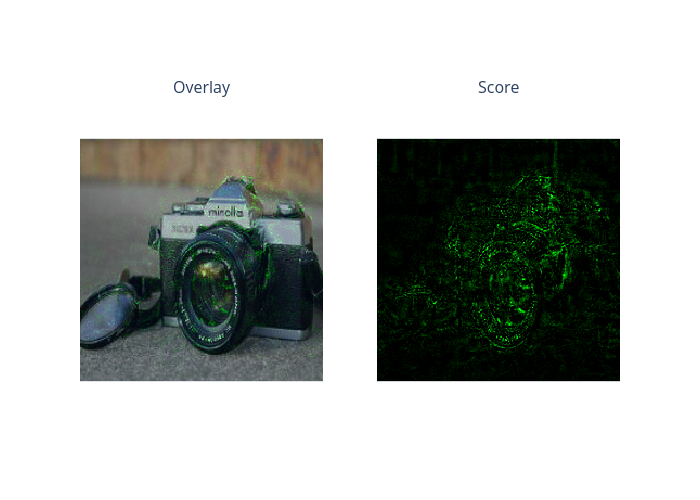
ig:
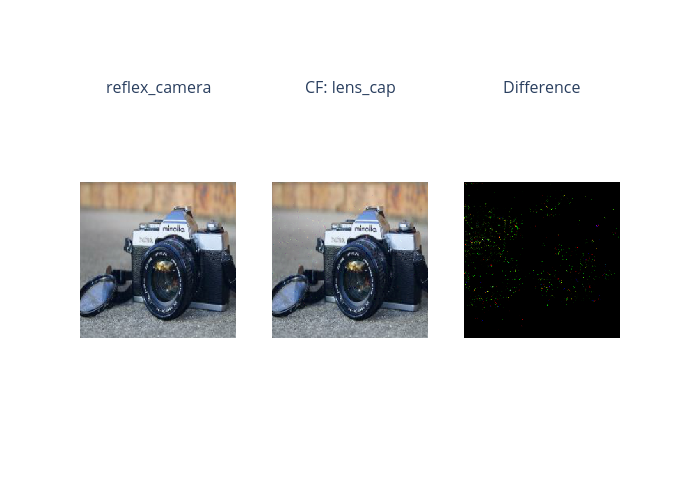
ce:
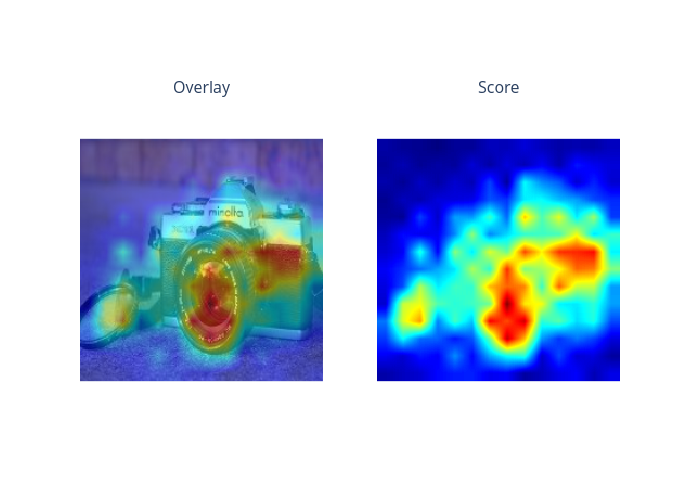
scorecam:
smoothgrad:
guidedbp:
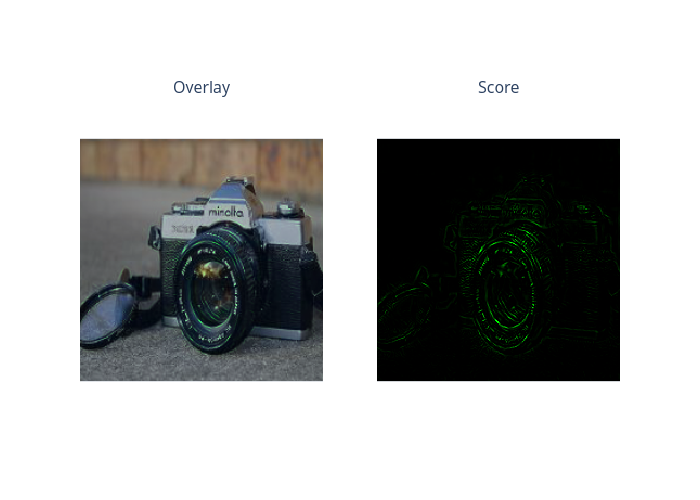
layercam:
Given the generated explanations, we can launch a dashboard (a Dash app) for visualization by setting the test instance, the generated local explanations, and the class names.
[8]:
# Launch a dashboard for visualization
dashboard = Dashboard(
    instances=img,
    local_explanations=local_explanations,
    class_names=idx2label,
)
dashboard.show()
Dash is running on http://127.0.0.1:8050/

 * Serving Flask app "omnixai.visualization.dashboard" (lazy loading)
 * Environment: production
   WARNING: This is a development server. Do not use it in a production deployment.
   Use a production WSGI server instead.
 * Debug mode: off
* Running on http://127.0.0.1:8050/ (Press CTRL+C to quit)