Feature visualization (PyTorch)
This is an example of feature visualization with a Tensorflow model. The feature visualization in OmniXAI is an optimization-based method, allowing to set different objectives, e.g., layer, channel, neuron or direction. For more information, please visit https://distill.pub/2017/feature-visualization/
[1]:
# This default renderer is used for sphinx docs only. Please delete this cell in IPython.
import plotly.io as pio
pio.renderers.default = "png"
[2]:
import torch
from torchvision import models
from omnixai.explainers.vision.specific.feature_visualization.visualizer import FeatureVisualizer
Here we choose the VGG16 model for demonstration (you may test other CNN models, e.g., ResNet). The target layer is the layer to analyze.
[3]:
device = "cuda" if torch.cuda.is_available() else "cpu"
model = models.vgg16(pretrained=True).to(device)
target_layer = model.features[20]
The first example is the “layer” objective, where we optimize the input image such that the average output of the layer is maximized.
[4]:
optimizer = FeatureVisualizer(
    model=model,
    objectives=[{"layer": target_layer, "type": "layer"}]
)
explanations = optimizer.explain(
    num_iterations=300,
    image_shape=(224, 224)
)
explanations.ipython_plot()
Step: 300 |████████████████████████████████████████| 100.0%

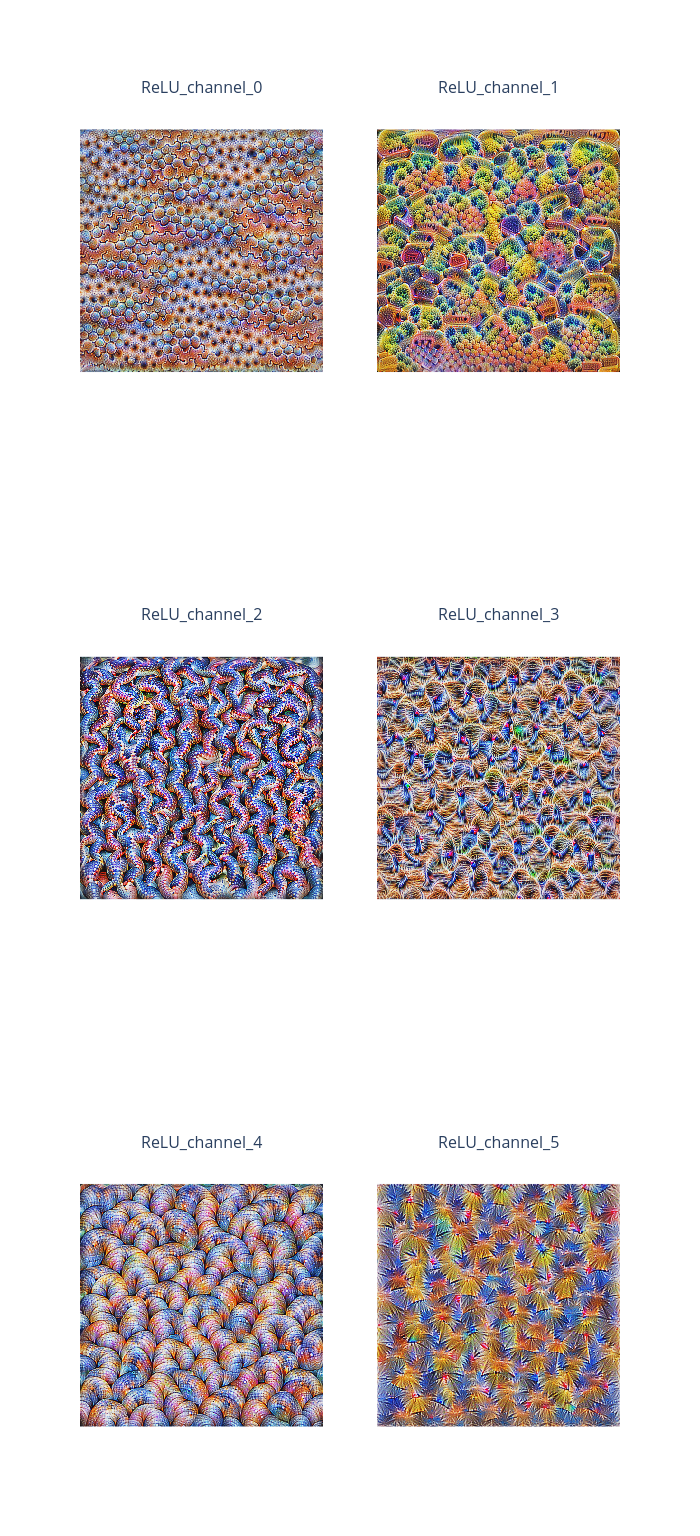
The second example is the “channel” objective, where the input image is optimized such that the output of the specified channel is maximized.
[5]:
optimizer = FeatureVisualizer(
    model=model,
    objectives=[{"layer": target_layer, "type": "channel", "index": list(range(6))}]
)
explanations = optimizer.explain(
    num_iterations=300,
    image_shape=(224, 224)
)
explanations.ipython_plot()
Step: 300 |████████████████████████████████████████| 100.0%
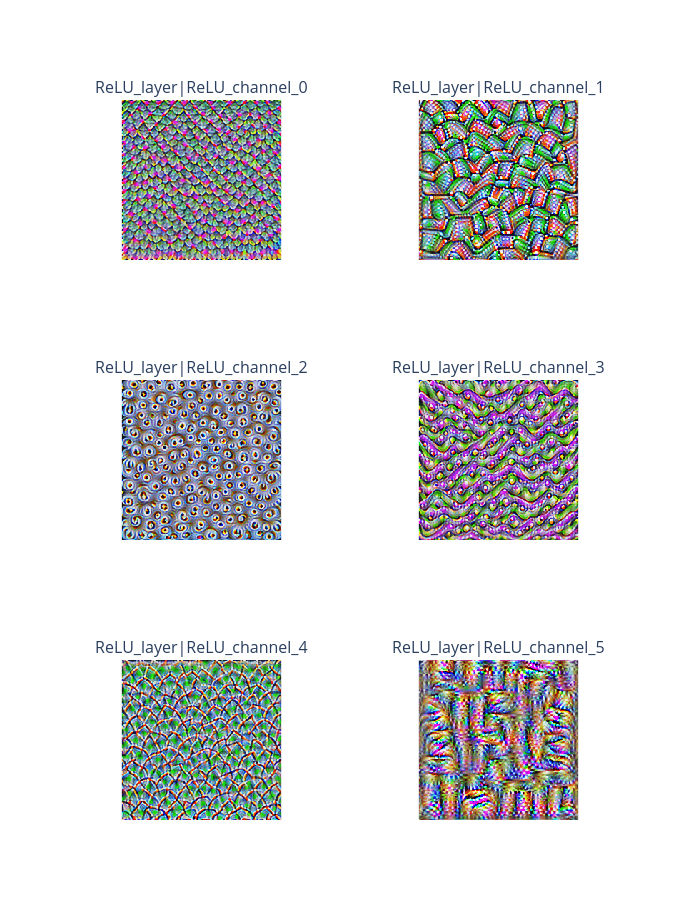
We can also consider a combination of multiple objectives. The default weight for each objective is 1.0. We can set other weights as well.
[6]:
optimizer = FeatureVisualizer(
    model=model,
    objectives=[
        {"layer": target_layer, "type": "layer", "weight": 0.1},
        {"layer": target_layer, "type": "channel", "index": list(range(6))}
    ]
)
explanations = optimizer.explain(
    num_iterations=300,
    image_shape=(224, 224)
)
explanations.ipython_plot()
Step: 300 |████████████████████████████████████████| 100.0%
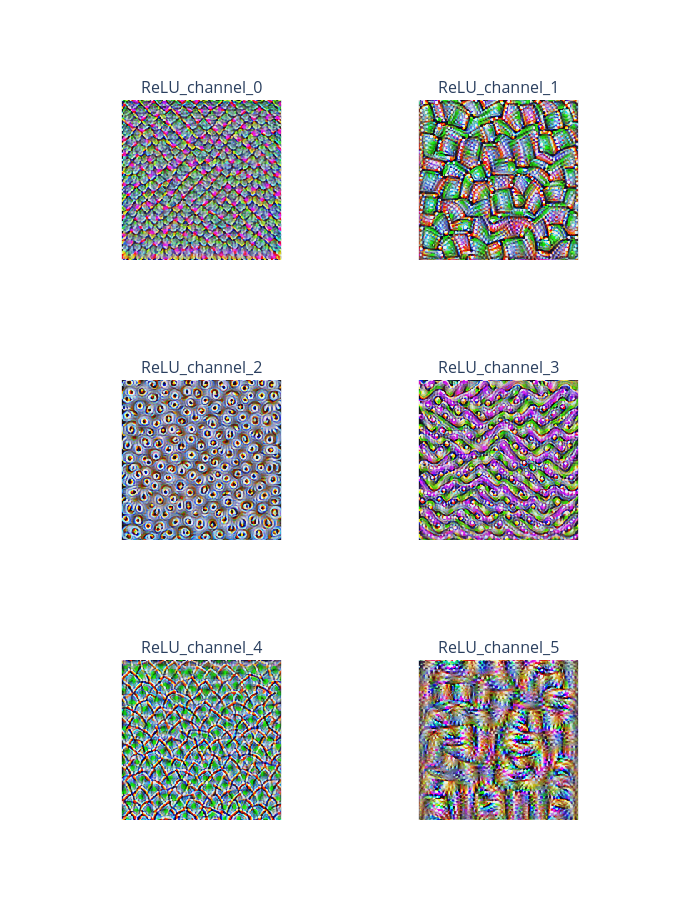
Let’s try another target layer and use FFT preconditioning:
[7]:
target_layer = model.features[-6]
optimizer = FeatureVisualizer(
    model=model,
    objectives=[
        {"layer": target_layer, "type": "channel", "index": list(range(6))}
    ]
)
explanations = optimizer.explain(
    num_iterations=300,
    image_shape=(512, 512),
    use_fft=True
)
explanations.ipython_plot()
The function torch.irfft is deprecated and will be removed in a future PyTorch release. Use the new torch.fft module functions, instead, by importing torch.fft and calling torch.fft.ifft or torch.fft.irfft. (Triggered internally at /pytorch/aten/src/ATen/native/SpectralOps.cpp:602.)
Step: 300 |████████████████████████████████████████| 100.0%