LLM Open Connector + watsonx
Learn how to implement Salesforce's LLM Open Connector with the IBM watsonx platform.
Prerequisites
- A Salesforce org with Einstein Generative AI and Data Cloud enabled.
- A Salesforce Einstein Studio Environment.
Step 1. Create Your watsonx Instance
Create an account.
-
If you don’t already have one, create a watsonx trial account.
If you have an existing, non-trial watsonx account, you need to follow these additional steps:
- In IBM Cloud, set up IBM Cloud Object Storage for use with IBM watsonx.
- Set up the Watson Studio and Watson Machine Learning services.
- Create a new project from the IBM watsonx console.
Find your Project ID value.
- In your sandbox, click the Manage tab and copy your Project ID value.
- Store the project-id value. You’ll need this value along with an API key and a region-id in step three.
Create an IBM Cloud API Key.
- In the IBM Cloud console, go to Manage > Access (IAM).
- In the sidebar, select API Keys.
- Click Create.
- Enter a name and description for your API key.
- Then, click Create.
- Store your API key in a safe location.
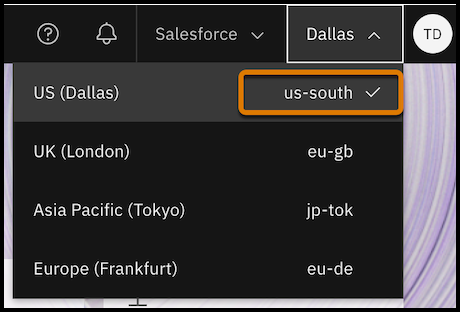
Get the region value for the watsonx instance.
- From the watsonx home page, check the region in the header bar.

- Store the region-id value.
Step 2. Verify Your Open Connector Implementation (Optional)
IBM automatically provides a working implementation of the Open Connector for watsonx that you can use to test this workflow. If you want to create your own implementation for production use cases, follow these steps. Otherwise, skip to step three.
- Create your own connector implementation for watsonx. For directions and code, see IBM's watsonx connector repo.
Step 3. Create a BYOLLM Connection to the watsonx Model in Einstein Studio
Before you connect your Open Connector implementation to Einstein Studio, you need three pieces of information from Step 1: project-id, API key, and region-id.
- Log in to your Salesforce org as an admin user and open Einstein Studio.
- Click Model Library.
- Click Add Foundation Model.

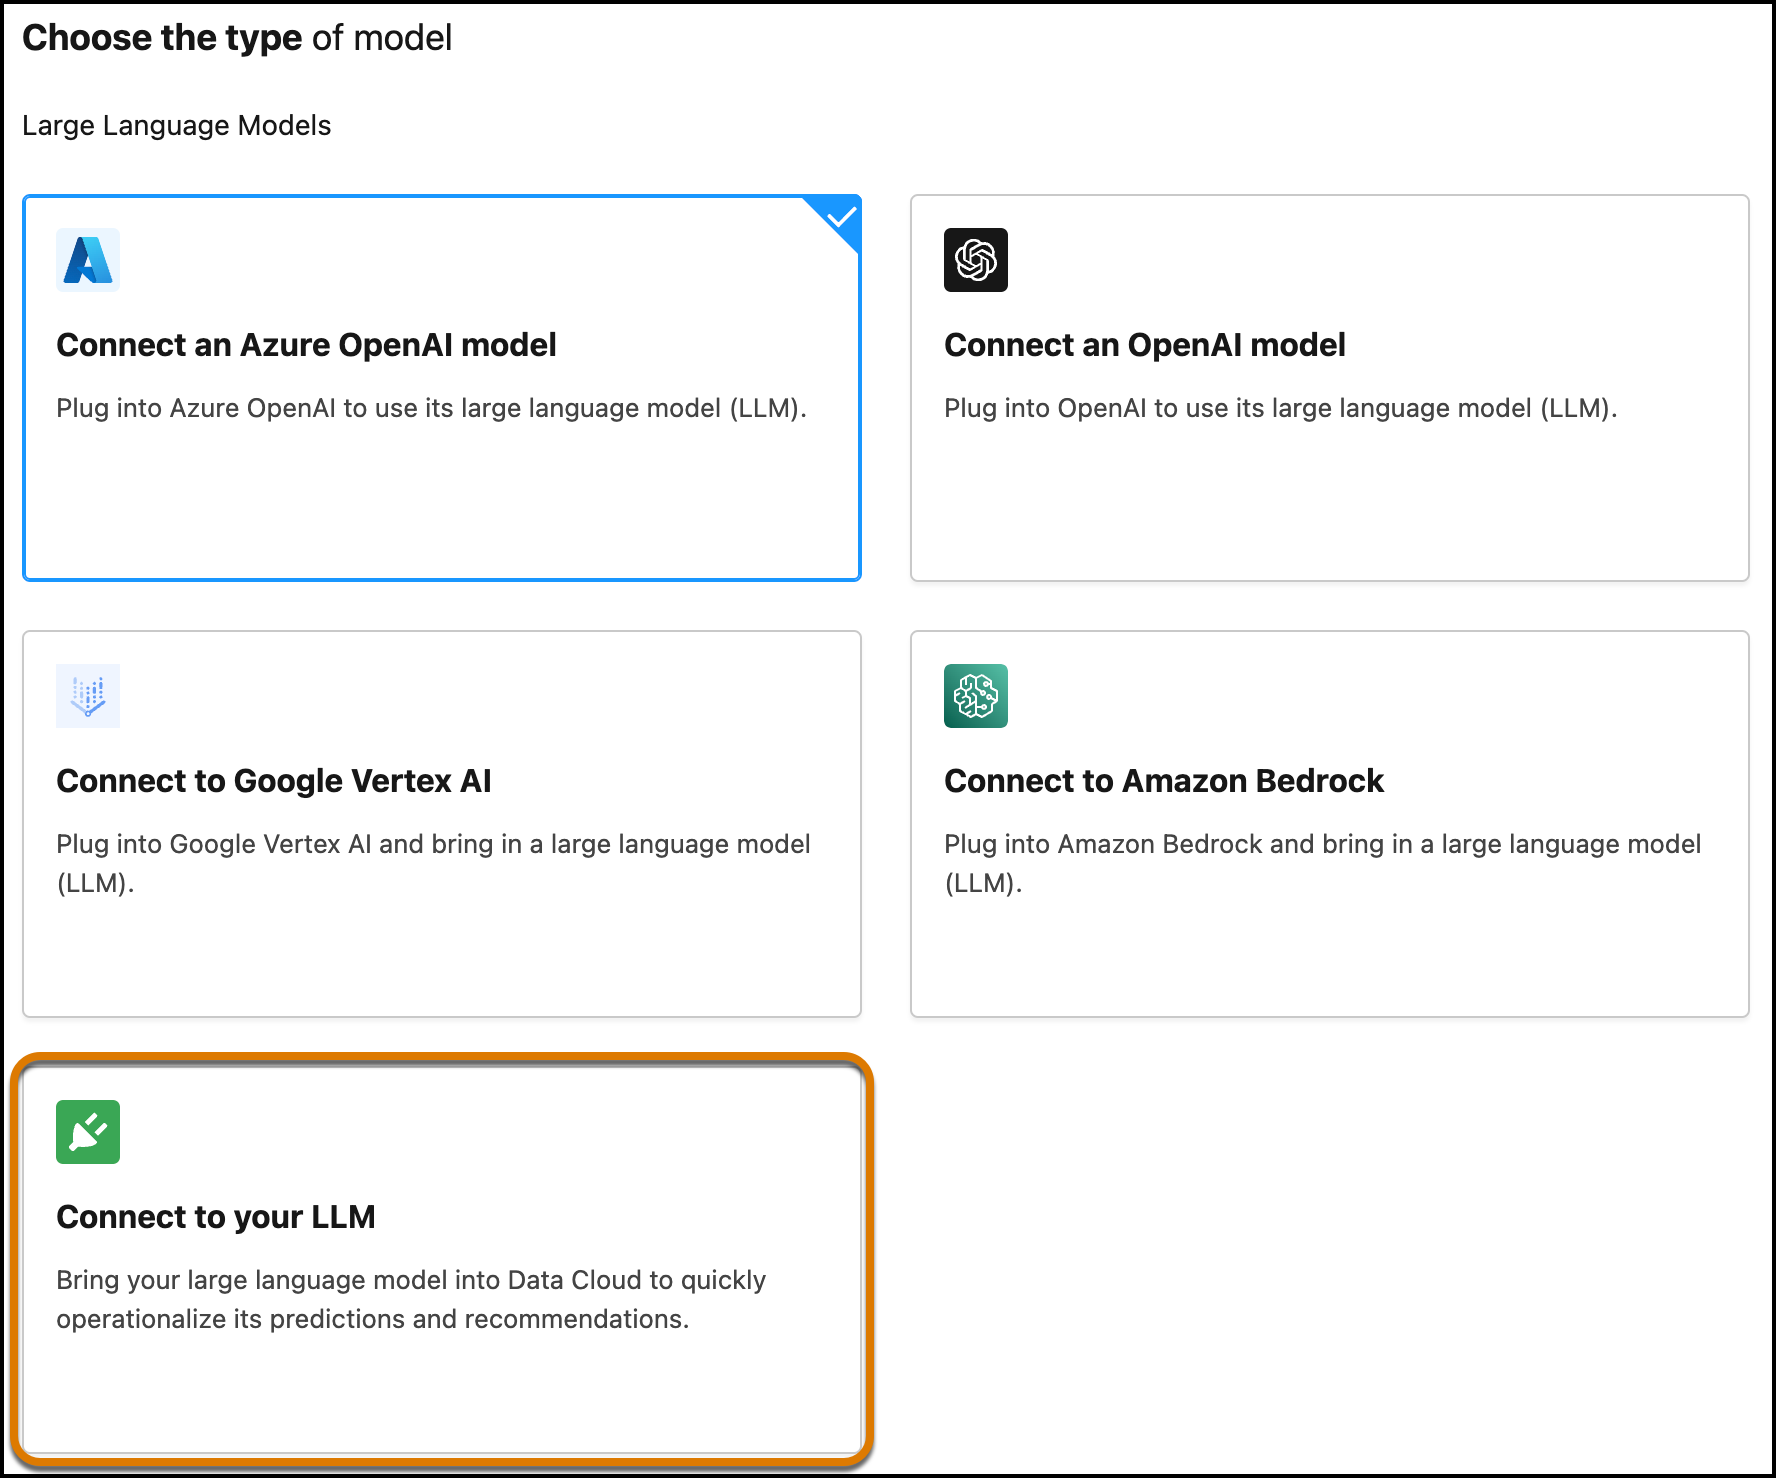
- In Model Builder, click Connect to your LLM.

- Click Next.
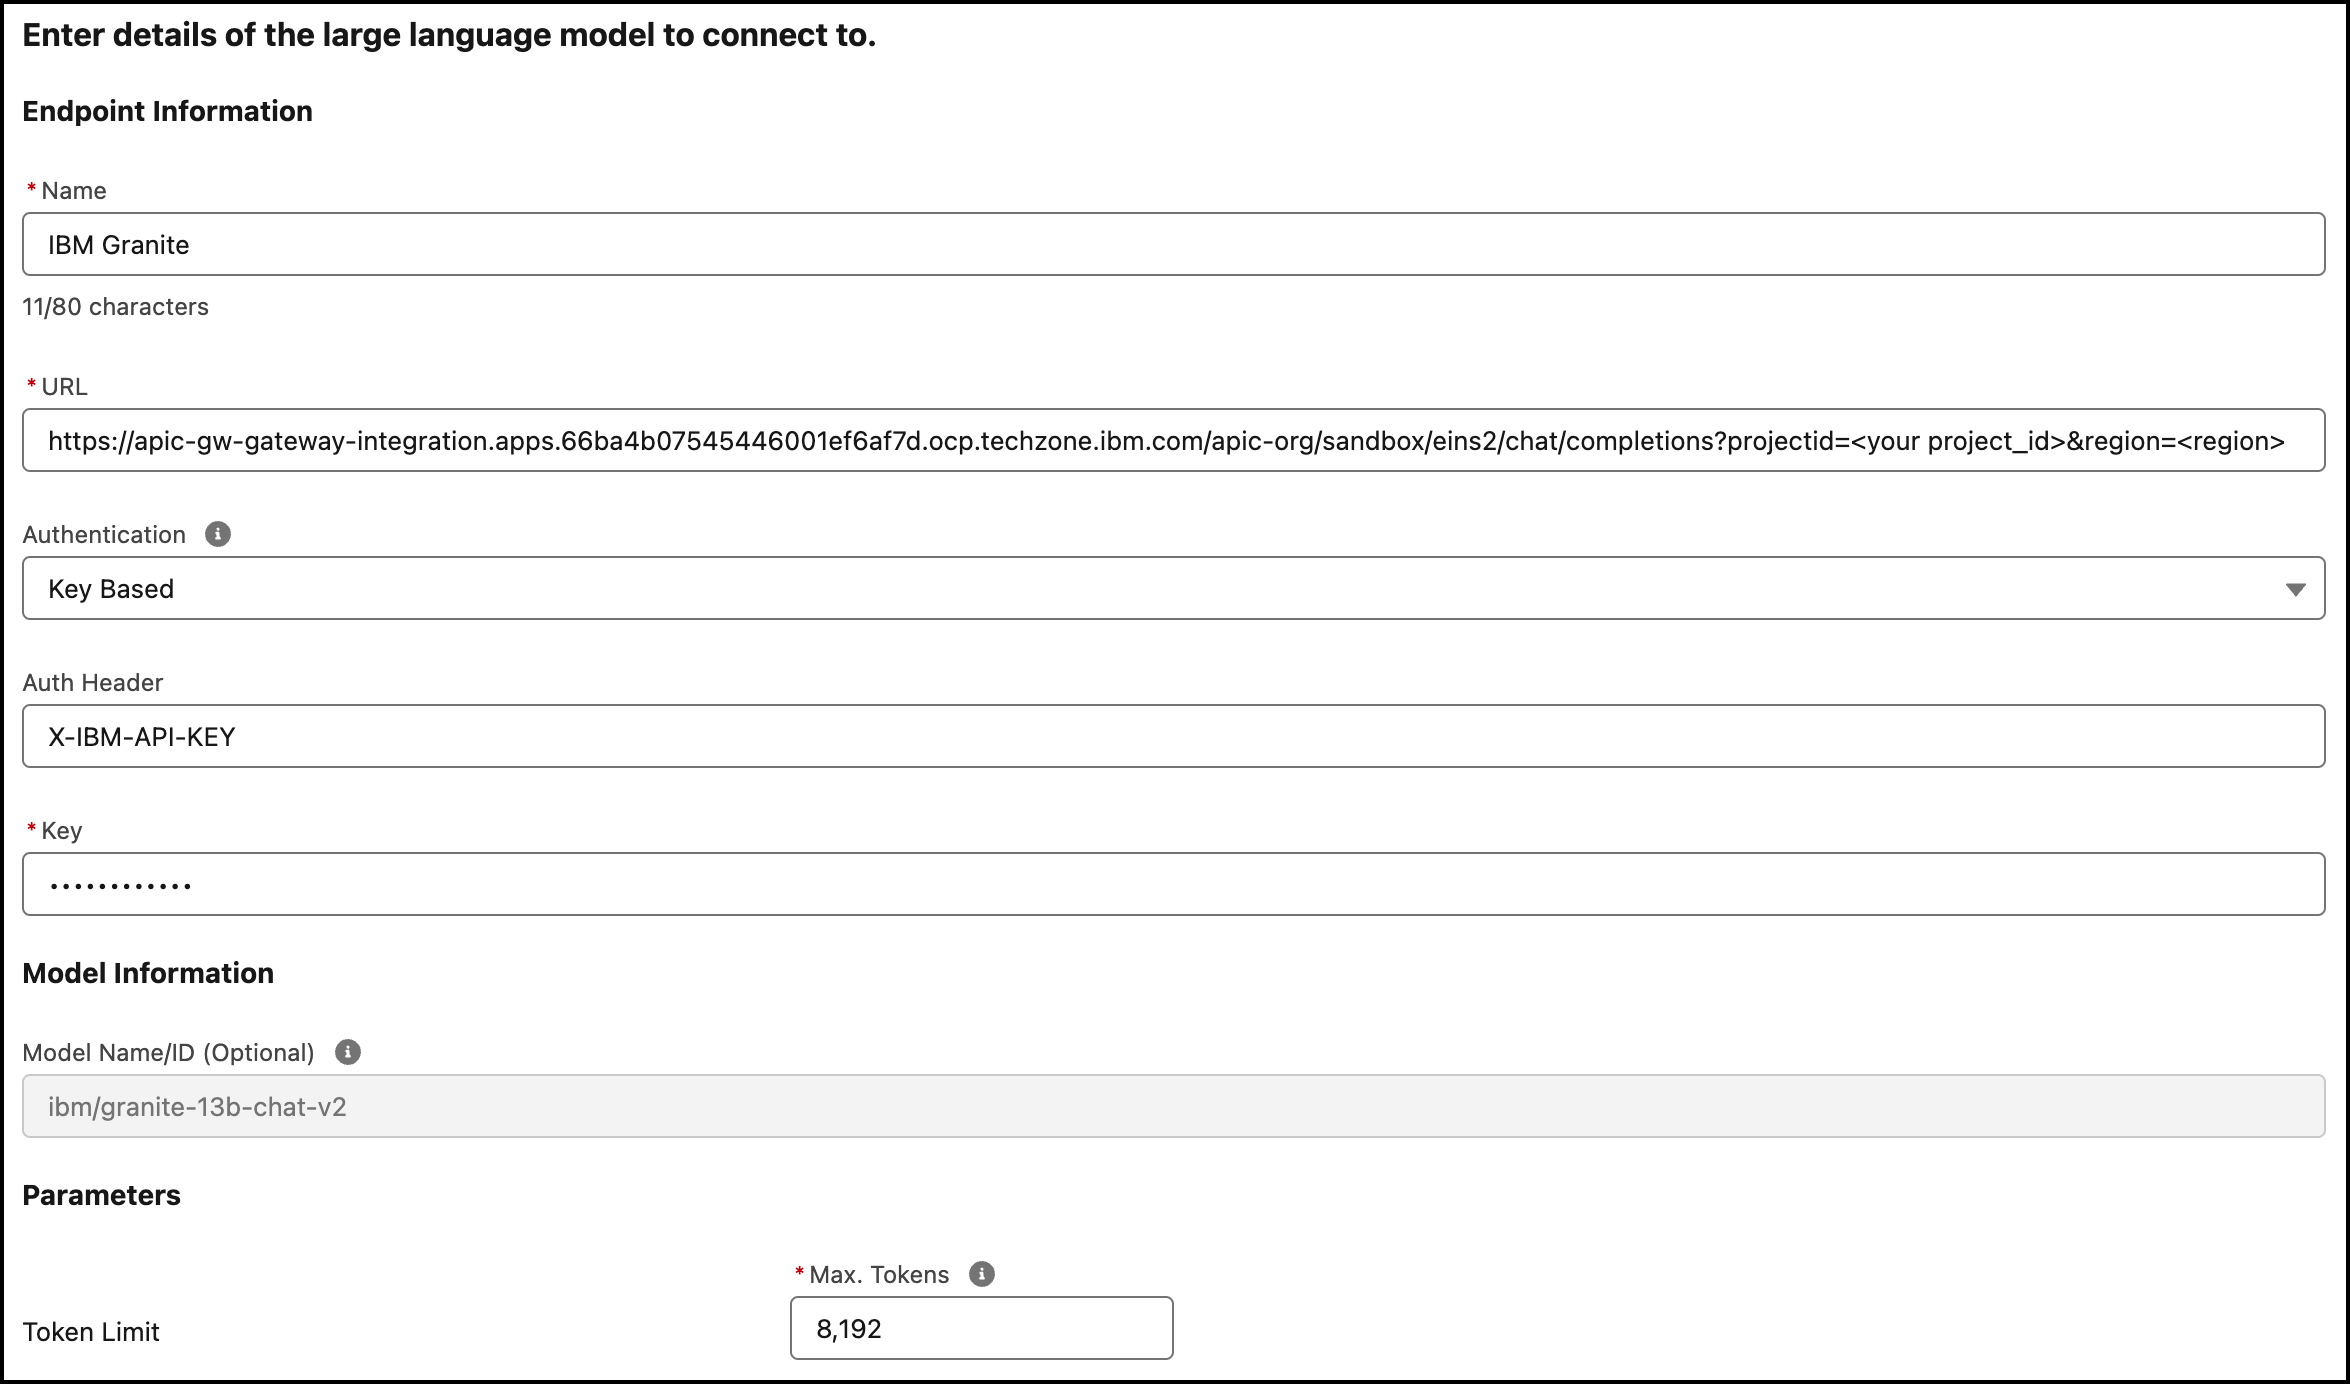
- Enter the details of your watsonx instance.
- Name: IBM Granite (or your own preferred name)
- URL: if you are using the connector hosted by IBM, get the URL from IBM's watsonx connector repo. Otherwise, use the URL from the connector instance that you have created from the code and documentation in the watsonx repo. When filling out the URL value, be sure to use the project-id and region-id that you copied from step 1.
- Authentication: Key Based
- Auth Header: X-IBM-API-KEY
- Key: [your IBM API key]
- Model Name/ID: ibm/granite-13b-chat-v2 (Or the specific model ID you want to connect to, refer to watsonx model IDs from your IBM watsonx console.)
- Token Limit: 8,192 (Or the specified model's maximum context length. Refer to the watsonx model IDs from your IBM watsonx console.)

- Click Connect.
- Click Name and Connect.
Step 4. Create a Configured Model
Before you can use your connected LLM, you need to create a configured model.
- In the Model Library in Einstein Studio, select Configure Foundation Model.
- Select Create Model.
- Choose your connected LLM from the “Foundation Model” dropdown.
- Configure the model parameters.
- Test the model performance in the model playground.
- After testing, click Save in the bottom right.
- Navigate to the "Generative" tab of the Einstein Studio Models page and verify that your watsonx configured model appears.
- Select your watsonx model to view the configuration details or create a prompt template.
You can now use your LLM wherever you can use Einstein Studio generative models. For instance, you can build prompt templates using Prompt Builder.
